Template Installation
Install Template Package
Before installing the Free Template Package, you must make sure that you have installed Joomla. Download the latest release of Joomla 4 at http://www.joomla.org/download.html, and install it on your localhost or hosting.
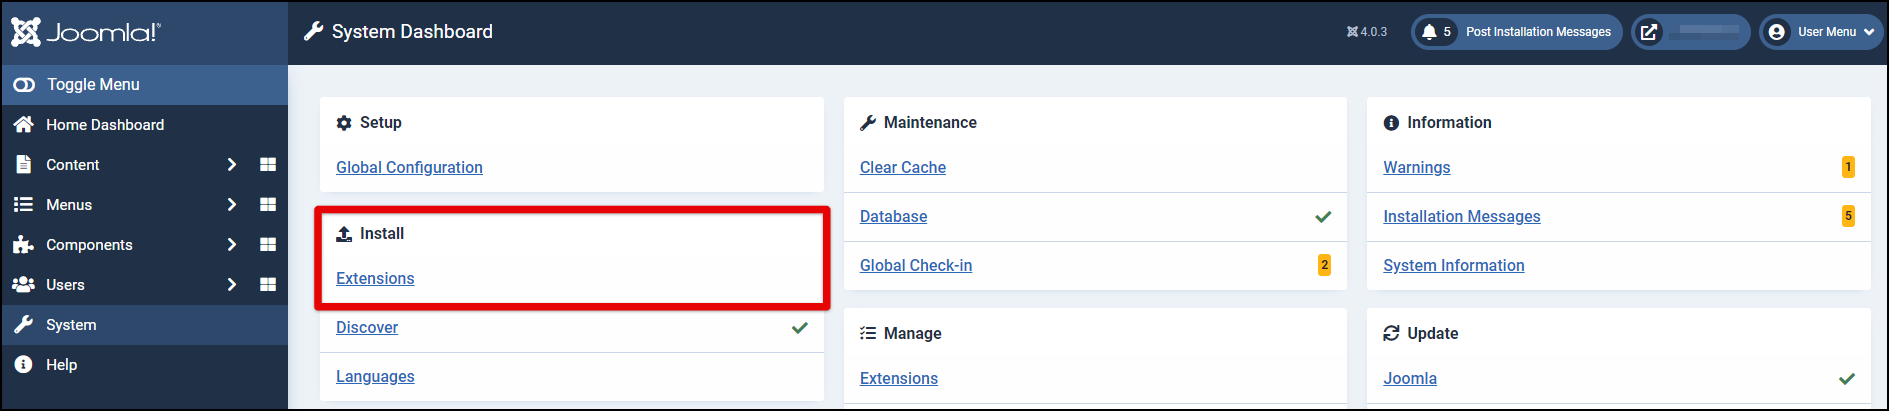
Template package use for a new website that you want to build content from zero without sample data, or using for your website with existing data. To install it, just download the Template Install-Package file and install it via Extension Manager (By go to Joomla! Admin panel > System > Install Extensions, browser file and click to upload). After finish, you can go to Template Manager, switch to default Joomla! template to new template.
To start to build your website, you can use standard Joomla! elements such as Articles, Modules, etc. Other extensions such as Page Builder, Slider, Portfolios, etc. you can see download links and documents via part Third-party Build-in Document. All extensions are FREE, you can download and install them without extra payment.
Install Quickstart Package and Active all Features (PRO)
If you want to access all features and get sample data and layout as on the live demo, consider getting the PRO version of the template. This package is only available in the PRO version, by access the PRO version, you just go to our Joomla! Template Listing, find your template name and go to the detail of the template, and order the PRO version.
With the PRO version, you have all access to template features, Quickstart download, and 12 months for dedicated support service!
Template Content & Styles
How to Display Main Menu
Open a new browser window and type in the URL, which will be similar to http://www.your-site-name-here.com/administrator or, if you have Joomla! installed on your local computer, http://localhost/your-folder-name-here/administrator. Here you will have to log in as an Administrator or Super Administrator.
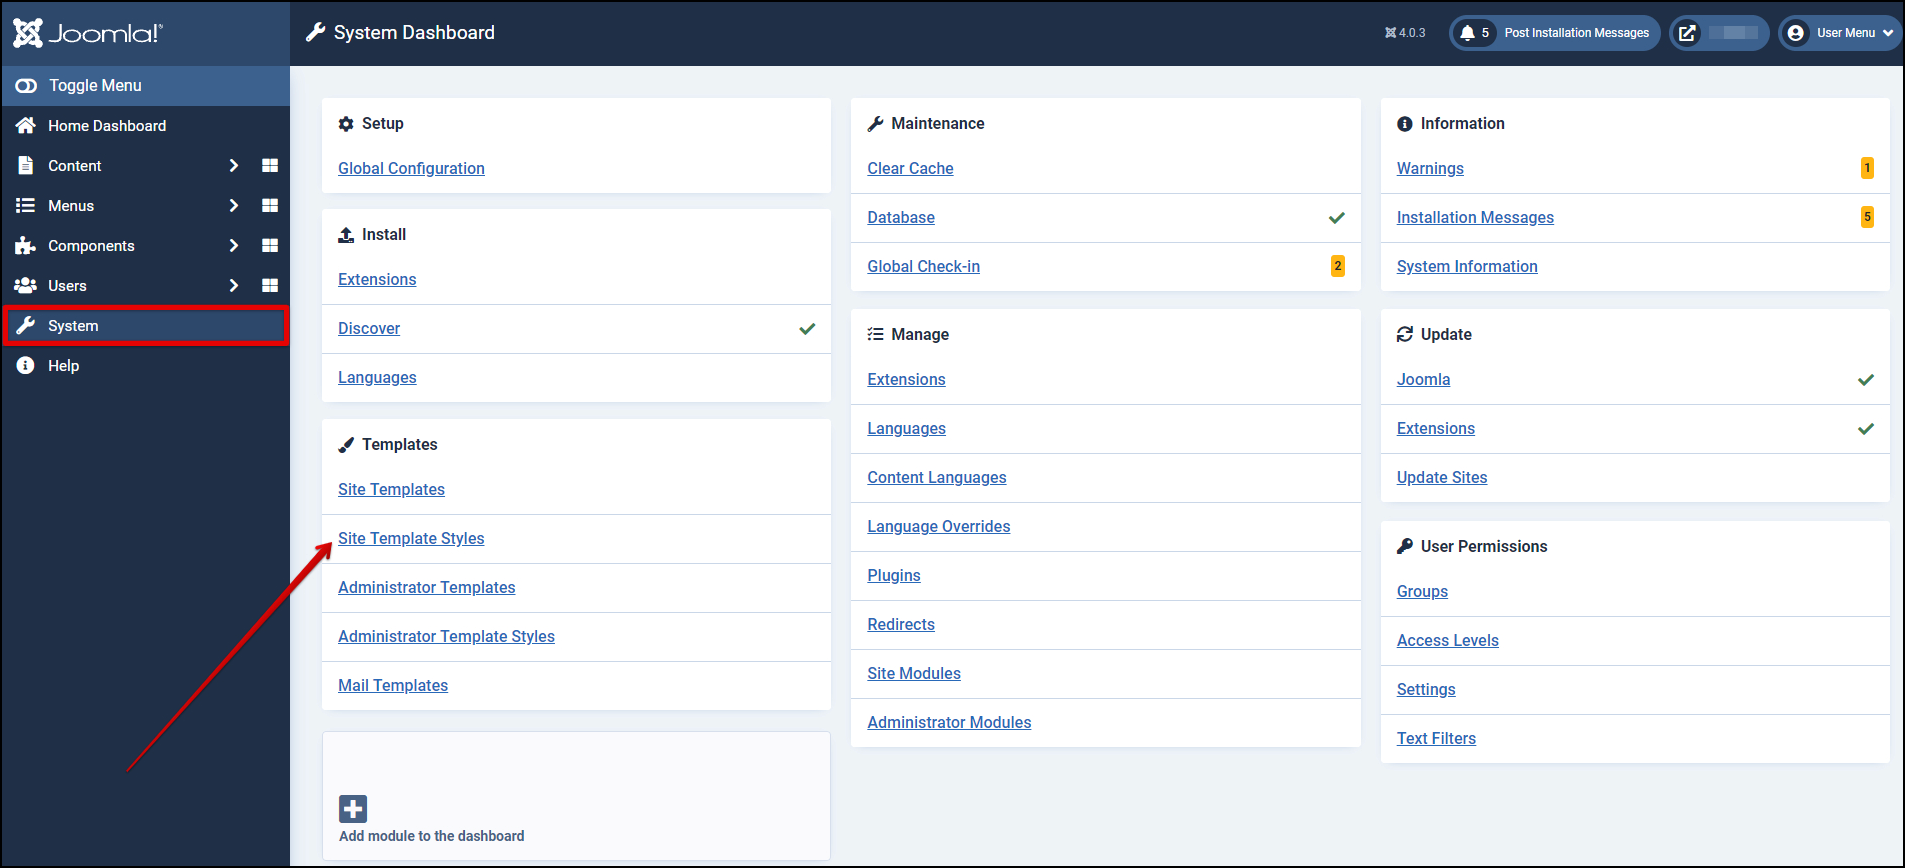
Go to “System” / “Site Templates Style” / “[template_name]-default”. This is where you edit template styles.
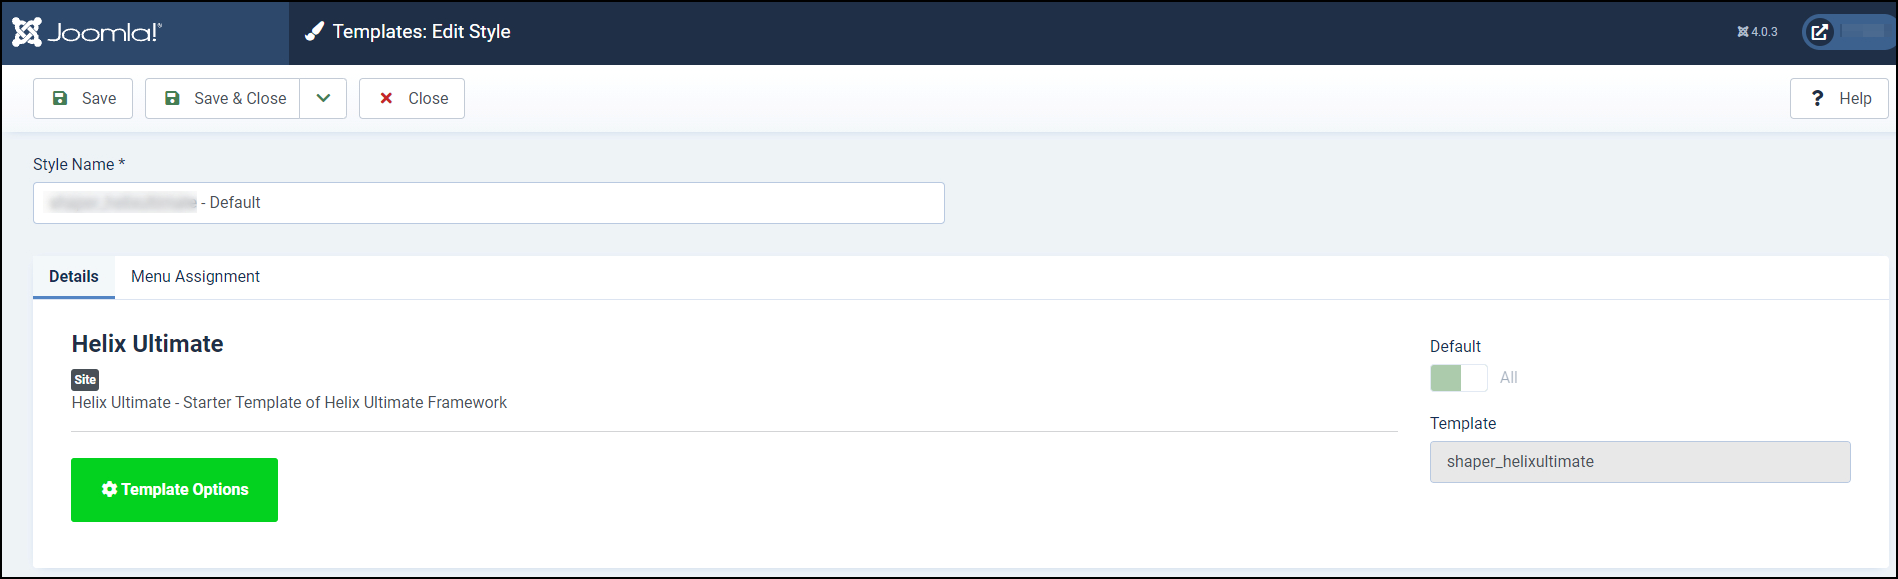
Please click the button “Template Options“.
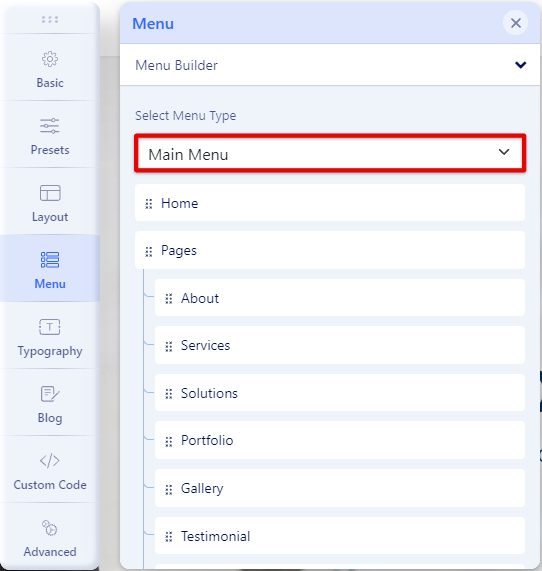
Please click Menu > Menu Builder and choose “Main Menu” at Menu Type.
Click the Save toolbar button to save the Main Menu. To leave without saving click the Cancel toolbar button.
Add Menu Items to Your Menu
To Create a New Menu Item:
- Select Menu → Menu Builder → [name of the menu] → Add New Menu Item. For example, if a Menu is called “Main Menu”, select Menu → Menu Builder → Main Menu → Add New Menu Item.
To Edit a Menu Item:
- Select Menu → Menu Builder → [name of the menu. For example, if a Menu is called “Main Menu“, select Menu → Menu Builder → Main Menu. Then either click the title of the menu item in the table list or select the menu item checkbox and click the “Edit” icon in the toolbar.
How to Add a New Menu
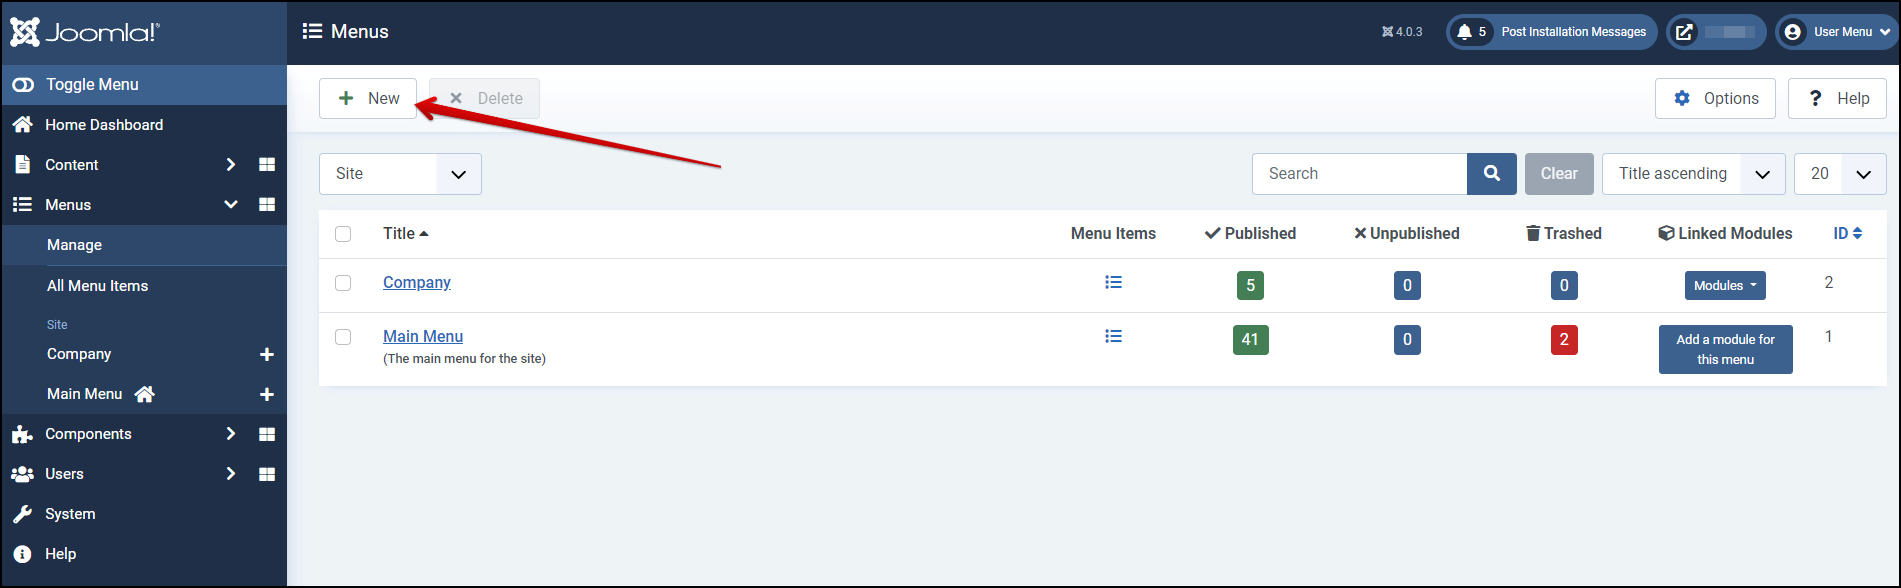
Within the site administration panel, select Menus from the menu bar in the upper left corner. From the drop-down list, choose “Manage” then choose “New”.
3. Fill in the “Title”, “Menu Type” and a “Description”:
- Title *: A proper title for the menu. This is used to identify the menu in the Menu Manager in the backend.
- Menu type *: This should be a unique identification name used by Joomla! to identify this menu. Spaces are not allowed but you may use the ‘-‘ character such as news-menu.
- Description: A description of the menu, useful for your own reference.
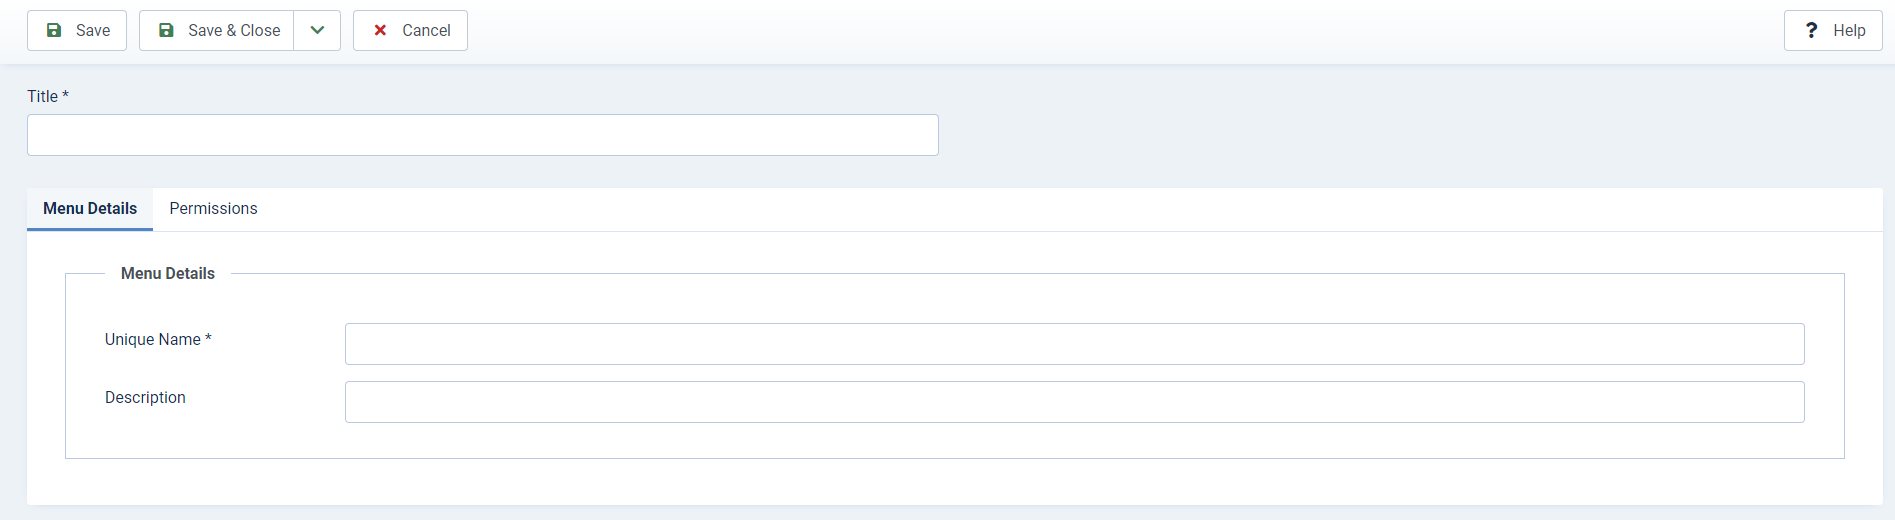
Click the Save or the Save & Close toolbar button to create the new menu. The Save & Close button will return you to the Menu Manager. To leave without saving click the Cancel toolbar button.
4. If you saved and closed, you will see your new menu in the list of Menus.
Template Settings
Go to “System” / “Site Templates Style” / “[template_name]-default”. This is where you edit template styles. When a template is first installed, a default style is created for it. The default style for the template will have the same name as the template with a – Default suffix.
There are 8 options for Style: Basic, Presets, Layout, Menu, Typography, Blog, Custom Code, Advanced.
Basic Options
There are 8 options for Basic: LOGO, HEADER, BODY, FOOTER, SOCIAL ICONS, CONTACT INFO, COMING SOON, ERROR PAGE
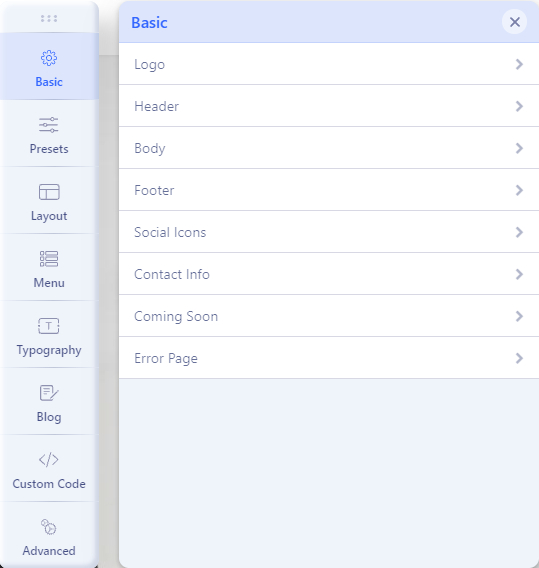
– Logo: The Logo setting provides the ability to easily change the Logo Type, Module Position, Image, Retina Logo and Mobile Logo.
– Header: The Header setting provides the ability to easily change the Sticky Header and Favicon of the header area.
– Body: This feature provides the ability to easily enable boxed layout.
– Footer: The Footer setting provides the ability to easily change Copyright.
– Social Icons: The Social Icons setting provides the ability to easily change Icons and Module Position.
– Contact Information: The Contact Information setting provides the ability to easily change the Information and Module Position.
– Coming Soon: The Coming Soon setting provides the ability to easily change the Coming Soon Title and Content.
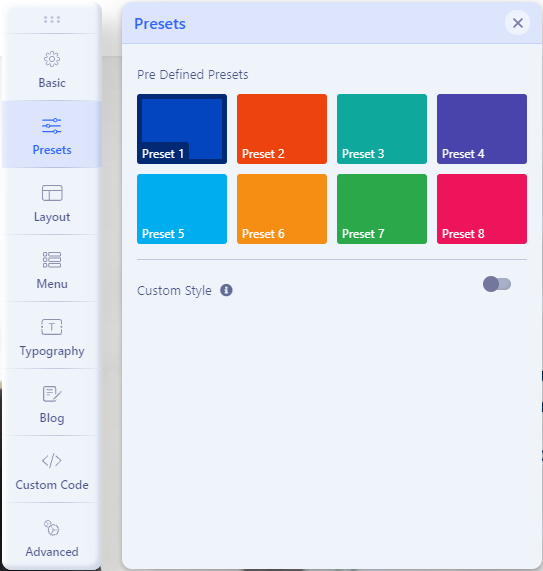
Presets (Color Styles)
The Presets setting provides the ability to easily change Styles and Options.
We defined 8 color presets for the template, you can select an existing color you want and Enable this option to use custom styles. Built-in presets will not work if this option is enabled.
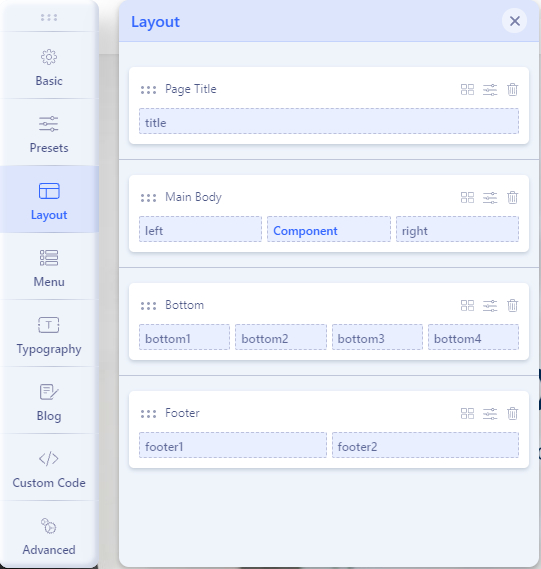
Layout (Template Positions)
The Layout setting provides the ability to easily change the layout template by using: Add Columns, Add Row, and Settings.
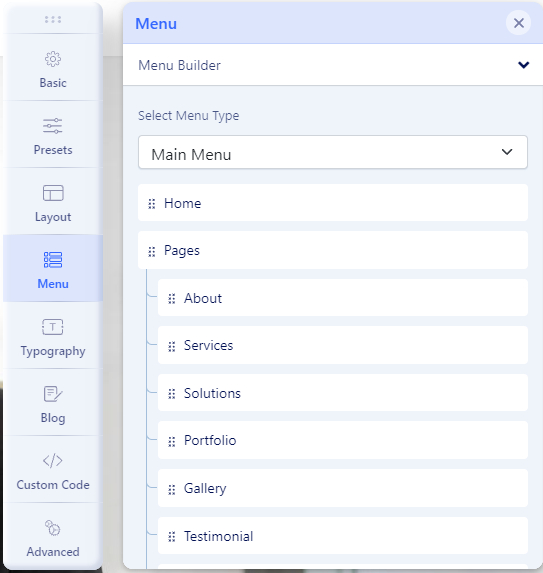
Menu (Location & Style)
The Menu setting provides the ability to easily change Menu, Menu Type, Dropdown Width, and Dropdown Animation.
Inside the Menu tab you will find the following tabs:
- Menu Builder – to manage menu structure and menu items content
- Mega Menu – basic settings for MegaMenu display
- Off-canvas – to manage appearance and content of Mobile Menu
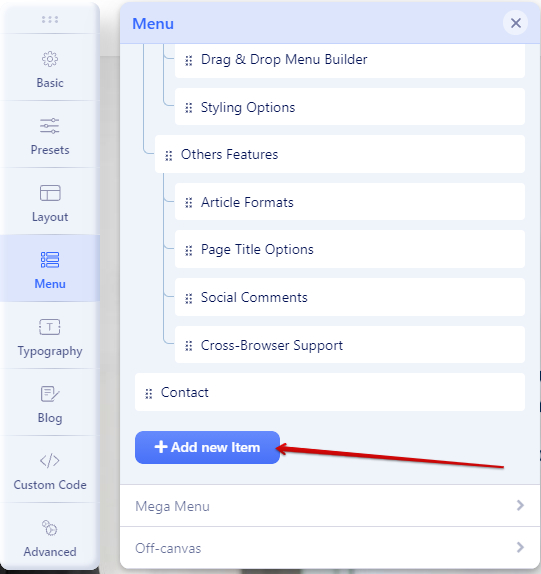
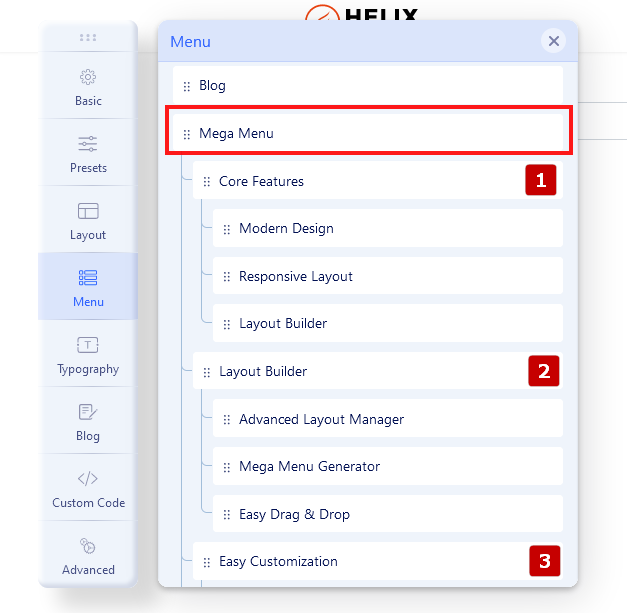
Menu Builder
Is an advanced system that allows you to manage menu structure (all menus) with all used items there. By default, it displays MainMenu with all submenu items. Using a mouse you can change the order of menu items, just grab and move up or down. You can also add a new menu item.
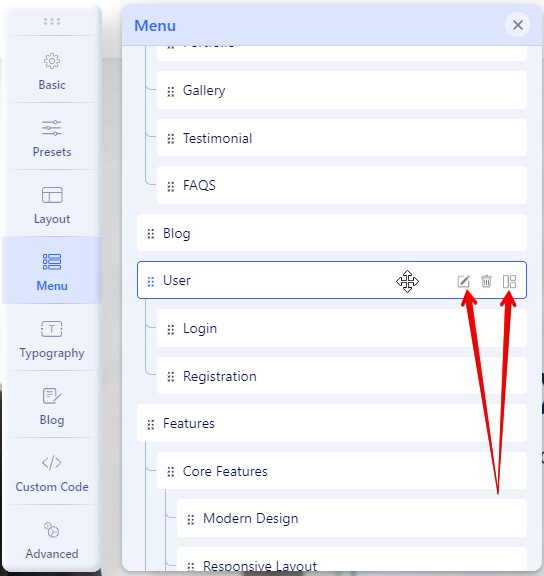
- Pen Icon – opens window edit options of chosen Menu Item.
- Basket Icon – allows you to delete chosen menu item.
- Grear Icon – extra settings for chosen menu item (Show Menu Title, Dropdown position, Icon, Custom Class, and Badge).
- Boxes Icon – access to extra settings and Mega Menu options if it would be enabled there. You can add and use badge, icon, and row and column-based menus, also drag and drop the modules to the menu positions from the modules list.
How to build advanced Submenu
If you want to have 2-3-4 columns in the menu as the first step you should start with building menu structure – add submenu items to the main menu item, it’s similar to the root structure. Here is an example of three columns submenu.
As 2nd step in the first main item please click the “Mega Menu” icon, then enable the “Mega Menu” option. Now you should click the “Add New Row” button. Now you can choose the column structure (it’s based on Boostrap columns grid) – you can use a predefined layout or create your own (Custom).
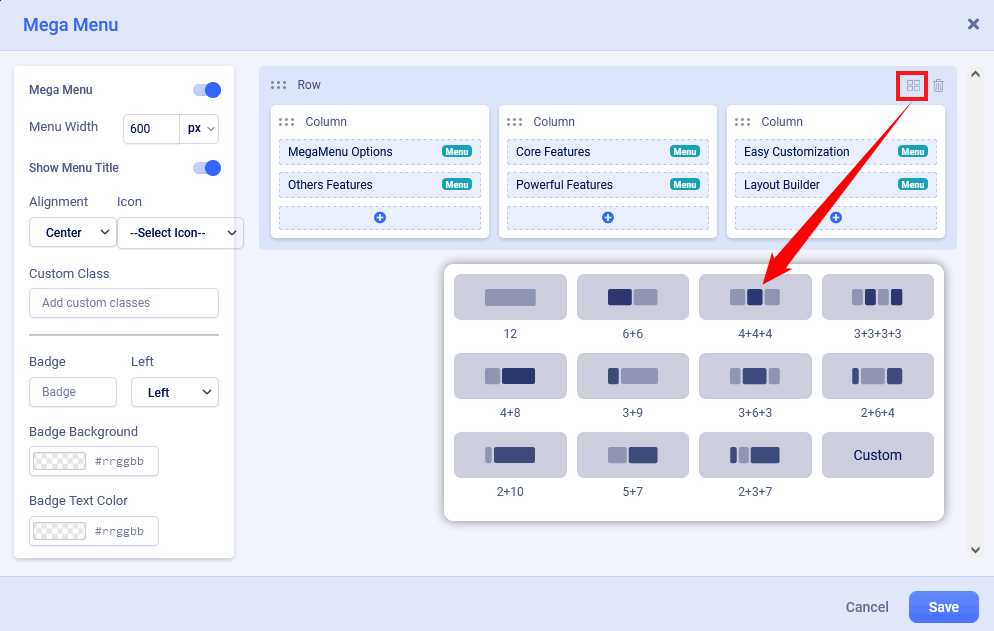
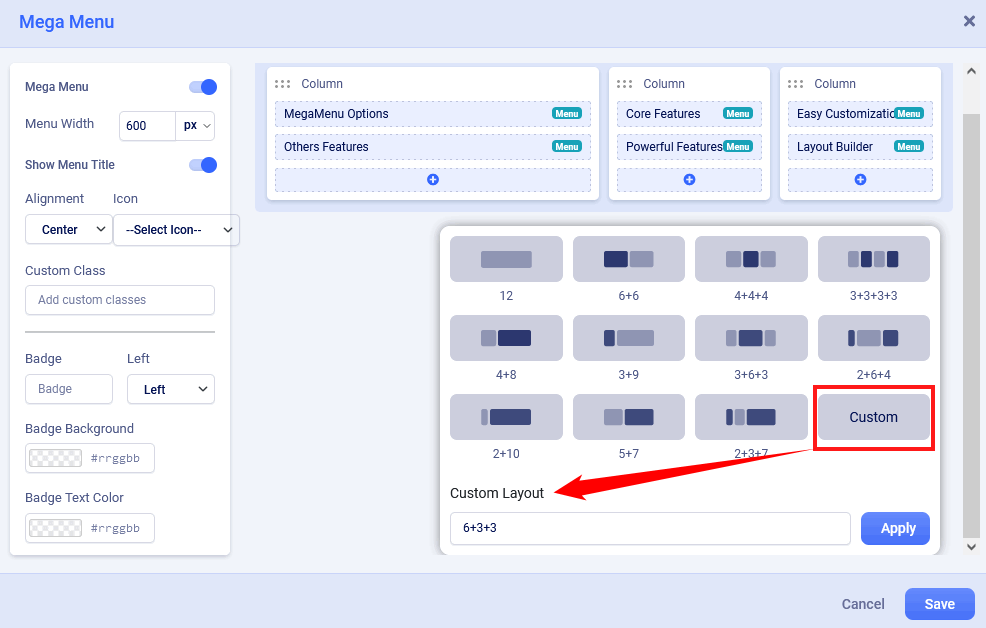
Custom Submenu structure is quite elastic so you can have many different grid layouts – for this purpose we created a “Custom” button. In theory summary of all columns should be equal to 12. For example 6+3+3 or 5+5+2.
Anytime you would be able to delete or redesign layout structure by using icons on the top right position.
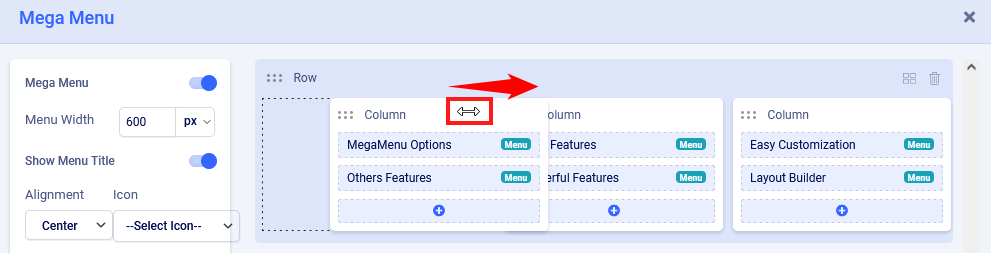
You can also change the order of columns content – hover on the column name until you would see a two-direction arrow icon then you can move the column to the left or ride side, later save settings to see changes.
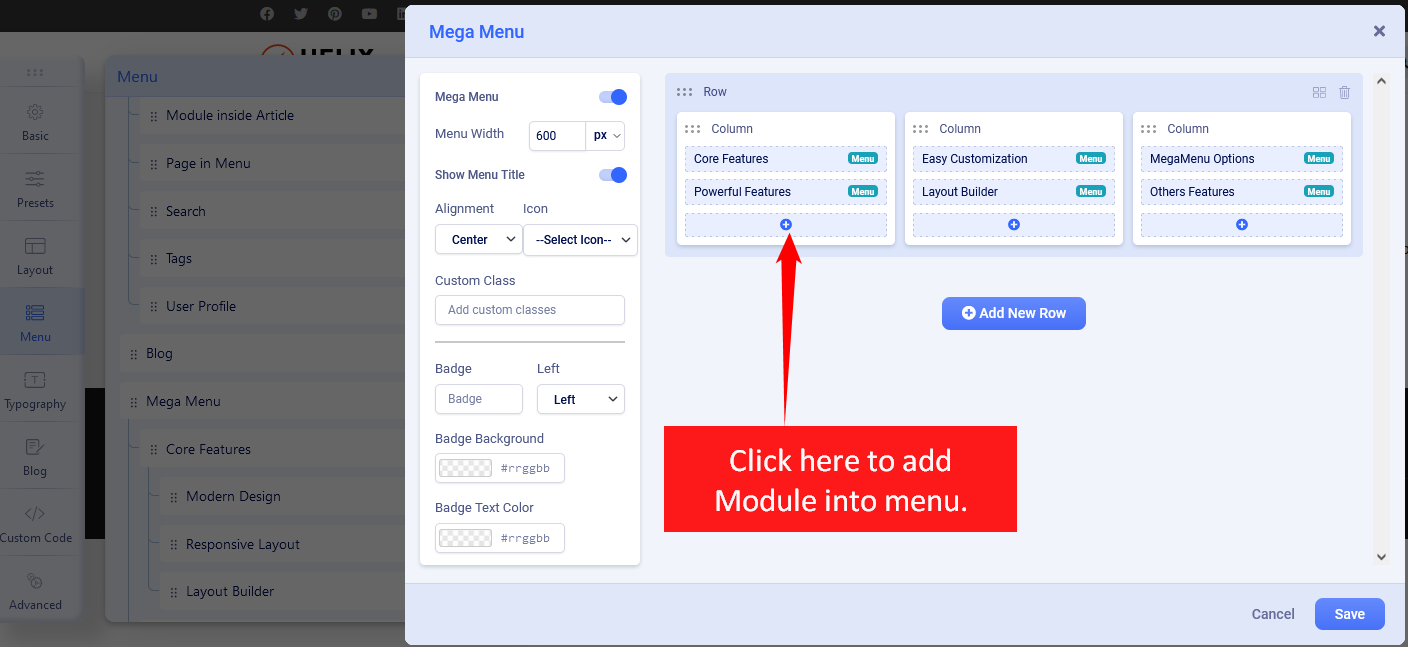
How to add a module inside the submenu
If you enabled Mega Menu and you have a row with a single column or columns you can add now any module from the list of available or installed. For example, you can display a banner, the latest articles, or a login module. Just click the plus (+) icon inside the column where the module should be, then selected a module.
How to add icons in menu items
Using the Mega Menu options allows you to insert an icon next to a menu item and/or use an icon instead of a menu item. As the first step choose an icon from Font Awesome Free 5.15.x collection (around 1600 icons to choose from).
![]()
And to have an icon only without a text menu item turn off “Show Menu Title” and then click Save to keep settings.
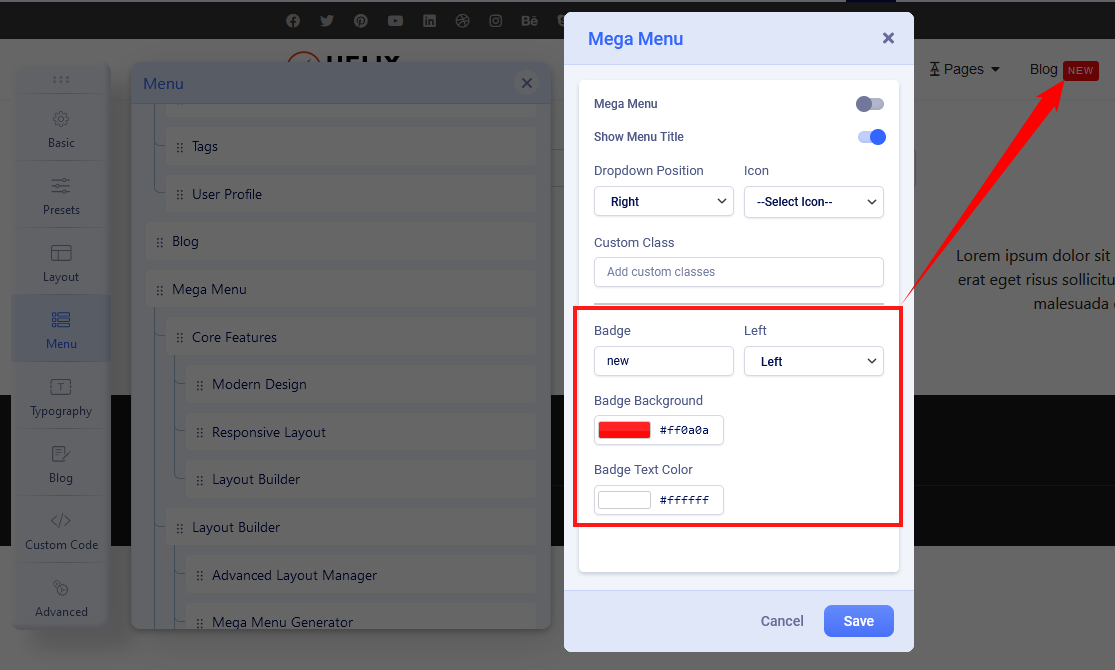
How to add badges in menu items
The badge is extra information displayed next to a menu item, it’s a helpful feature to highlight a menu item. You can use any word there. Then choose the position of the badge (left, right). Next select background color and text color, if you would not choose any color options, by default dark red with white text would be used.
Mega Menu
Menu type – By default, there are enabled two separate menus: Mega Menu and Off-Canvas Menu – sometimes called Hamburger Menu, because of the used shape. In desktop view, you can use both or only MegaMenu. It is pretty easy to disable the Off-Canvas menu from desktop view only. Just select “Mega Menu” and Save settings.
Dropdown Width – Width value is used to declare submenu width content area. By default is 240px. You can choose not only value itself but also different units for expressing width (px, em, rem, %).
Dropdown Animation – Mega Menu offers several transition options for your dropdown submenus:
- No Animation
- Fade In
- Fade In Up
- Fade In Down
- Rotate In
- Zoom In
- Pulse
This is the transition that occurs when the submenu is opened. To have the sub-menu appear with no fancy effect, just set it to None (No Animation).
Off-Canvas / Mobile Menu
Off-Canvas is a mobile menu based on a menu module but customized by the Helix Ultimate framework. It’s used in Mobile and Tablets view mostly. Yes, can be displayed on desktop view as well, in that case, just check Mega Menu tab settings.
Available settings:
- Off-canvas Position – select a position for the off-canvas menu, it can be on the left or right side.
- Select Offcanvas – select premade design for displaying the off-canvas menu (left align, left bordered or center align). Yes, you can create your own design. Just create a new style here: templates\[your-template]\offcanvas – using one of the existing styles as source code inspiration.
- Select Offcanvas Menu – select which menu should be used for the off-canvas (mobile) menu. Compare to old helix framework versions now by default, you don’t have to publish any menu module to get the mobile menu.
- Maximum Level – select what deep of menu structure should be displayed in the Off-Canvas (Mobile) Menu. If you choose ‘All’, all levels will be shown.
- Enable Search – display the search (classic search in J3.x) field in the off-canvas box.
- Show Contact – display contact information, for example, phone number and e-mail.
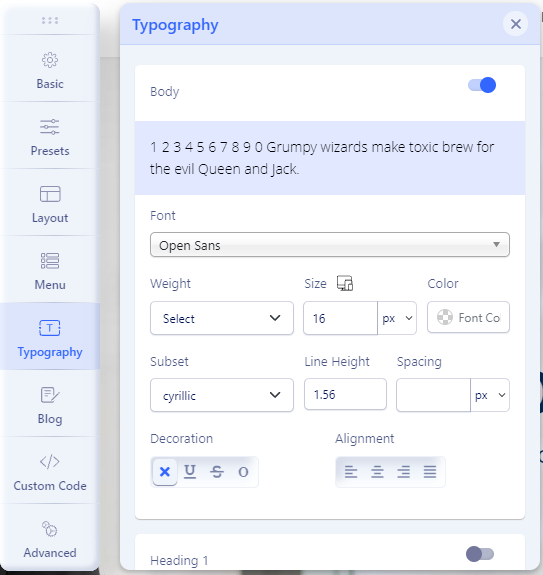
Typography (Font & Size)
The Typography setting provides the ability to easily change Font Family, Font Weight & Style, Font Subset, Font Size, and update Google Fonts List.
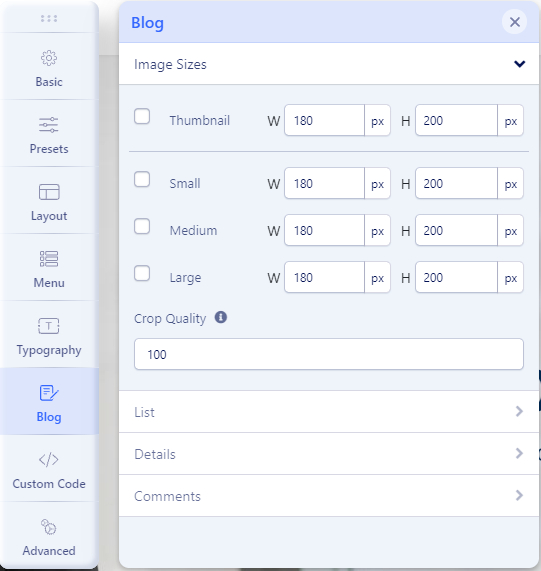
Blog (Joomla! Articles)
The Blog setting provides the ability to easily change Image Sizes, List, Details, and Comment Settings.
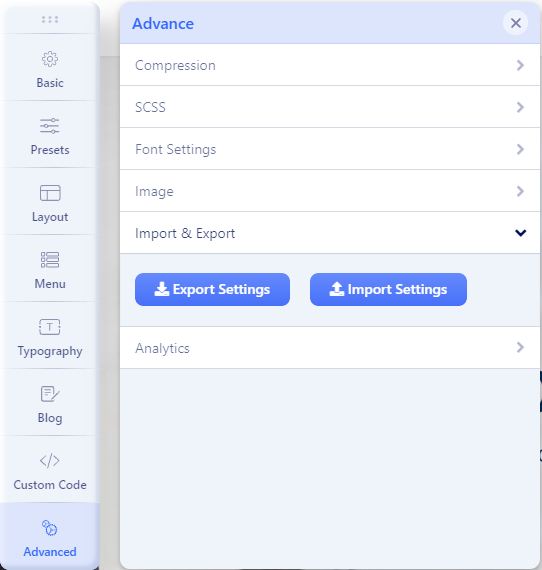
Advanced (Compress / Import & Export Options)
Compression Settings
With these features, you can enable Compress Function for CSS and Javascript files, or Exclude Javascript you want.
Import & Export Options
With this feature, you can import and export template settings. It is also possible to export initial settings such as typography, logo, and importing available settings of the template that you want to install
3CX Live Chat
We’re using 3CX Live Chat as FREE Live Chat for our product. This is strongly recommended for any business. You just set up and it’s ready to use, download 3CX FREE Live Chat via Joomla! extension directory.
In order to activate your live chat you need to sign up with 3CX StartUP to get your web portal and apps to answer live chats.
- Get your free 3CX Account.
- Follow the steps in the wizard.
- Take note of the 3CX Talk URL that you will be given during the live chat step.
- Read our Getting Started Guide.
Remove / Replace Copyright
If you’re using Free version, copyright on footer will be shown. You can’t remove it, it’s copyright information for a template that you must to keep in order to use a template as Free license with us.
If you want to remove this copyright or replace with new content, please go with PRO version. Visit all Joomla! templates, find your template name and purchase PRO version.
Third-party Build-in Document
Template Framework
Helix Ultimate https://www.joomshaper.com/helix
CSS Libraries
Font Awesome http://fortawesome.github.io/Font-Awesome/
Bootstrap CSS http://getbootstrap.com/
CMS Using
Joomla! CMS http://www.joomla.org/
Support system
Forum & Ticket System
Install Service
If you want to install the Quickstart package on your hosting, you can order here.
Extra Services
Customization Task
If you want to hire our developer for a custom template, you can request here.
Development Service
Looking for a new template for your project, and only use it for your website, ask our developer here.